Thursday, May 18, 2023

The Hitchcock Project-Halsted Welles Part One-The Dusty Drawer [4.33]

by Jack Seabrook

Halsted Welles (1906-1990) began his career as a director for the Broadway stage, in charge of various shows between 1936 and 1948. He also wrote the last one that he directed, but it only ran for five nights. He taught drama at Yale and Smith in the 1930s and 1940s and he began writing for the radio in 1944, including many episodes of Suspense.

After his stage career ended, he began writing scripts for films in 1949 and for TV shows in 1950; he wrote many teleplays for the TV version of Suspense in the early 1950s. He continued writing films on and off until 1968, including the screenplay for 3:10 to Yuma (1957), but most of his work after 1950 was for television, including six episodes of Night Gallery and six episodes of Alfred Hitchcock Presents. His last teleplay aired in 1976. The FictionMags Index shows only one short story by Welles, published in 1953.

*   *   *   *   *

"The Dusty Drawer"
was first published here
The first episode of the Hitchcock show to air with a Welles teleplay was "The Dusty Drawer," which premiered on CBS on Sunday, May 31, 1959. It was based on a short story of the same name by Harry Muheim that was published in the May 3, 1952 issue of Collier's.

As the story begins, Norman Logan sees William Tritt eating in a cafeteria and joins him, asking Tritt when he will return the $200 he stole from Logan. Ten months ago, Logan cashed in bonds worth $324 and Tritt, a bank teller, entered $124 in Logan's checking account. Logan, a botany professor at a university in New York City, is convinced that Tritt took his money to cover up an error.

Tritt walks across the street and enters the bank; Logan follows a few minutes later and removes a few bonds from his safe deposit box before chatting with Pinkson, the bank manager, who summons Tritt to cash the bonds. While Logan sits waiting at a table, he discovers an old drawer that is hidden from sight beneath an overhang. He opens the drawer and finds a "dirty, cluttered mess," including a dead spider and a calendar page from 1936. Logan realizes that the drawer has been forgotten and is nearly invisible. Tritt comes over and cashes Logan's bonds without mentioning their earlier conversation in the cafeteria. Logan returns to the university and suddenly realizes how he can use the drawer to "rob the bank and pin the robbery on Tritt."

Dick York as Norman Logan
Two months pass and, in November, Logan begins to enact his plan. At a novelty store on 51st Street, he buys a cigarette case that looks like a .38 automatic pistol; at a shop on Second Avenue, he compares the toy to a real gun to confirm that it looks authentic. Finally, he takes the subway uptown to the bank. Logan sits down at the table and, when no one is watching, puts the toy gun in the hidden drawer. He checks on it during two subsequent visits and a week before Christmas he makes his move.

Visiting the bank to cash more bonds, Logan takes the gun out of the drawer. When Tritt sits down next to him, Logan points the gun at him and demands $10,000 in twenty-dollar bills. When Tritt goes to get the money, Logan replaces the gun in the drawer. Tritt summons Pinkson and Louie, the bank guard, holds Logan at gunpoint, but when he is searched, no gun is found. Tritt is embarrassed but insistent, and Pinkson apologizes to Logan.

In the weeks that follow, Tritt begins to make mistakes, and in late January Pinkson tells Logan that the teller has been getting upset easily ever since the incident in December. On March 10, Logan confronts Tritt with the gun again, but this time Tritt brings him $10,000 in a bag. Logan again replaces the gun in the drawer and adds the bag of money. When he leaves the bank, Tritt sounds the alarm, leading to a similar, fruitless search outside the bank. Tritt makes a spectacle of himself looking for the money and insults Pinkson, who slaps the teller. Pinkson has Tritt arrested and the next day, Logan returns and retrieves gun and money from the drawer.

Philip Coolidge as William Tritt
At home, Logan types a letter to Pinkson, apologizing and returning the money, and signs it with Tritt's initials. The next day, Pinkson telephones Logan to say that Tritt returned the money but continues to deny taking it. Tritt is fired and Pinkson apologizes to Logan, who goes back to work.

"The Dusty Drawer" is a well-plotted tale of revenge, where Logan discovers an invisible hiding place, has a sudden inspiration, and then enacts a plan over the course of the next six months or so that ruins the career of an officious bank teller. Why does Logan go so far to discredit Tritt? It is because the man refuses to admit an error that cost the college professor $200. The scenes where Logan tricks Tritt with the toy gun are entertaining, and Muheim creates an environment in which it is believable that the teller can open and close the forgotten drawer without being seen, thus allowing him to put first the gun and then the money inside with the certainty that they will not be discovered. Logan's ethics are twisted; he is willing to go to great lengths to humiliate Tritt even though he has no proof that the bank teller took his money in the first place. The story plays out over the better part of a school year, starting right after Logan returns to work in September and ending in March, not long before summer break begins. The dusty drawer represents the hidden side of the bank, where a teller steals money from a customer to cover up his own error, in contrast to the clean, efficient exterior that greets the public. When Logan discovers it, the drawer is a demonstration that there is more to the bank than what is seen on the surface. He is thrilled to be able to utilize this knowledge to right a wrong.

The story's author, Harry Muheim (1920-2003) earned a Bronze Star while serving in the Navy during WWII. From 1950 to 1959 he wrote teleplays for TV anthology shows while also teaching speech and drama at New York University. He published three short stories during the decade, including "The Dusty Drawer." In the 1960s, he began writing speeches for politicians and he later wrote several TV documentaries and a novel.

Wilton Graff as Pinkson
In a note following the story in Hitchcock in Prime Time, Muheim writes that, after his story appeared in Collier's in 1952, he adapted it for TV as a live, one-hour episode of the Philco Television Playhouse, using "the device of the performer-as-narrator." William Prince, the lead actor, "would play a scene, turn from the scene to comment to the camera, then turn back into the scene. It was a complex device that worked against the essential simplicity of the prose piece."

Subsequent research has revealed that Muheim's adaptation of "The Dusty Drawer" actually appeared on the Goodyear Television Playhouse on NBC on Sunday, August 3, 1952. It was a live broadcast that appears to have been lost. Muheim's memory lapse is understandable since Goodyear and Philco alternated weeks as the show's sponsor.

"The Dusty Drawer" was collected in the 1953 volume of Best Detective Stories of the Year and reprinted in the March 1956 issue of Ellery Queen's Mystery Magazine. Finally, it was adapted by Halsted Welles for Alfred Hitchcock Presents in 1959. The TV show is not as successful as the short story.

J. Pat O'Malley as Col. Binns
In the first scene, instead of meeting in a cafeteria across the street from the bank, Tritt and Logan sit next to each other at a table in Mrs. Merrell's boarding house, where they both reside. A telegram is delivered by Tritt and it turns out that it was sent by Logan, who demands his $200. Adding other characters around the table allows Welles to introduce the situation that exists between the two men while adding more dialogue and injecting a humorous tone. A short scene follows that is set in front of the boarding house, with dialogue similar to that found in the short story's cafeteria scene.

The third scene occurs inside the bank, where Pinkson is introduced. Logan accidentally drops his bonds on the floor under the table and discovers the dusty drawer when he bumps his elbow against it and it gives way; in the TV show, it is less clear that it has been forgotten for years. While in the story, Logan goes back to work and has his epiphany there, in the TV show he immediately is struck by an idea and is so excited that he leaves the bank without cashing his bonds. The events in the TV show are sped up and the time sequence is compressed from that of the short story; the entire episode takes place between Thanksgiving and Christmas.

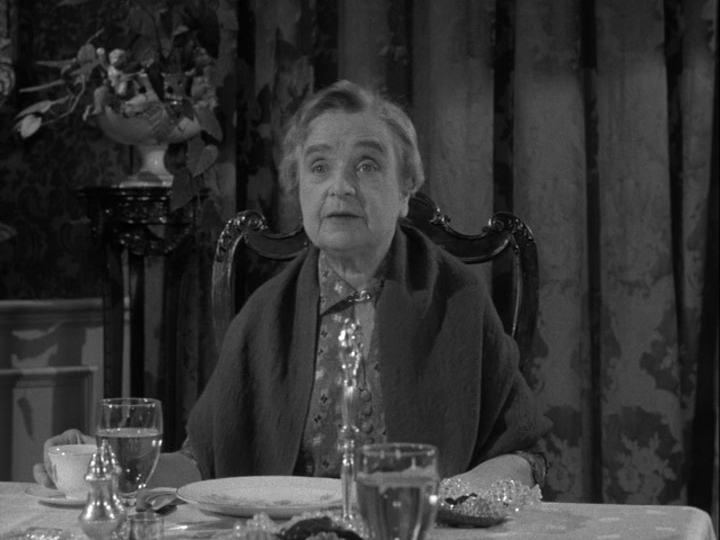
Almira Sessions as Mrs. Merrell
Logan immediately goes to a toy store and buys a plastic gun, not a cigarette case that resembles a gun. He returns to the bank, with only a short amount of time having passed, and holds Tritt up at gunpoint for the first time, leading to the first search. In the scenes up to this point, Tritt has been smug and self-satisfied, and when Logan holds him up there is a clever bit of business where Logan uses his finger inside his coat pocket to mimic a gun even after he has put it back in the drawer. At the end of the incident, Pinkson thanks Logan for not making a complaint and Logan chalks his own generosity up to the Christmas season.

In the next scene, Tritt is a changed man, agitated and making mistakes, while Logan stands outside his teller's cage, whistling "Jingle Bells" in front of a large Christmas tree. Tritt hides from Logan in Pinkson's office and the bank manager emerges to speak with his whistling customer; Logan tortures Tritt even more by offering to drive him home, at which point Tritt insists that he is fine while washing down pills with a glass of water.

Charity Grace as Mrs. Radford
Dinner at the boarding house follows as snow falls outside and another telegram is delivered. This time it's for Logan, who antagonizes Tritt by leaving it on the table unopened. Tritt is paranoid and complains to the other boarders, finally insisting that Logan open the telegram, which turns out to be from his mother. This scene features more humor involving the other residents. Logan returns to the bank and holds Tritt up for the second time; this time, he conceals the gun in one of his oversized mittens, allowing him to pretend to be holding it even after it is back in the drawer. By now, Tritt is a beaten man, his body language exhibiting defeat. When Logan is searched outside the bank, Tritt ends up digging in a snowbank, looking for the gun and the money until only his feet can be seen, sticking out of the snow. The effect is overly silly and demonstrates that the show's writer and director chose to play up the story's humorous aspects.

Logan re-enters the bank and puts the gun and the money in his briefcase. Once again, events are compressed in time and there is little attempt to conceal what he is doing with the drawer. As a result, his actions lack credibility. Another scene at the boarding house follows; it's breakfast time, and Tritt and Logan are absent from the communal table. Tritt is in the mental ward and Logan is in his room, typing the letter to Pinkson and signing Tritt's name. He reads the letter aloud for the viewer's benefit and, in a change from the short story, deducts $200 from the $10,000 he returns and keeps it, reimbursing himself for the theft that precipitated the events of the story. The final scene takes place at the bank, where Pinkson tells Logan that Tritt returned the money (minus $200) and will be fired. The effect is ironic, with Logan displaying a smug smile as "Deck the Halls" plays on the soundtrack.

Edgar Dearing
as Louis
The TV version of "The Dusty Drawer" is less satisfying than the short story. The timing of events is compressed and the dusty drawer, the central item in Logan's plan, never seems particularly well hidden, nor does Logan seem to try to keep his actions private. Adding the scenes at the boarding house is an attempt to add humor and dialogue for exposition, but the additional characters are not necessary to the story. Having Logan keep $200 at the end makes sense, but the punishment he doles out to Tritt seems overly harsh and the character of Logan ends up being as smug and self-satisfied as Tritt was in the early scenes.

The casting is perfect--Dick York is exactly right as Logan, while Philip Coolidge is believable as Tritt, even though he is physically the opposite of the fat man in the short story. Wilton Graff is excellent as the bank manager. The other people at the boarding house are forgettable.

This episode was directed by Herschel Daugherty (1910-1993), a prolific TV director from 1952 to 1975 who also directed a couple of movies. He directed 27 episodes of Alfred Hitchcock Presents in all, including "The Blessington Method," and he directed 16 episodes of Thriller.

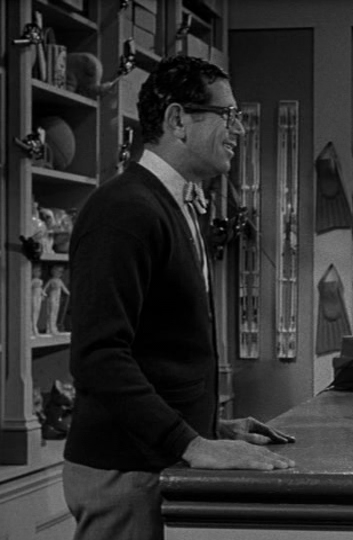
Barry Brooks as the
toy shop salesman
Dick York (1928-1992) stars as Logan. York was born in Indiana and his screen career lasted from 1953 to 1984. Plagued by terrible back pain caused by an injury sustained on the set of a film, he nevertheless appeared in seven episodes of the Hitchcock show, as well as being on The Twilight Zone and Thriller. York's most famous role, however, was as Darrin Stephens on Bewitched, the popular situation comedy where he co-starred with Elizabeth Montgomery from 1964 to 1969, when he quit the show due to his back problems. Among his other appearances on the Hitchcock show was "Terror at Northfield."

Philip Coolidge (1908-1967) is perfect as Tritt; a radio announcer turned stage actor, he was on screen from 1947 to 1968, appeared in Hitchcock's North By Northwest (1959), and was seen in seven episodes of the Hitchcock TV series, including "Whodunit." He was also on The Twilight Zone.

Wilton Graff (1903-1969) plays Pinkson, the bank manager; he was on screen from 1939 to 1964 and also appeared in two other episodes of the Hitchcock show, including "Death of a Cop."

In smaller roles:
  • J. Pat O'Malley (1904-1985) as Colonel Binns, who sits at the head of the table at the boarding house; born in England, he began his career in the entertainment industry as a singer in 1925. He later emigrated to the U.S. as a singer and soon began acting, appearing on film starting in 1940. He was in Broadway shows from 1944 to 1954 and replaced John Williams as the inspector in "Dial 'M' for Murder"; he is best known today for his many TV roles, from 1950 to 1982, including appearances on The Twilight Zone, Thriller, Batman, and Night Gallery. This was his only role on the Hitchcock show.
  • Almira Sessions (1888-1974) as Mrs. Merrell, who runs the boarding house; her first stage role was in 1909 and regular appearances on radio followed. She appeared in numerous films and TV shows from 1932 to 1972, including Night Gallery and one other episode of Alfred Hitchcock Presents.
  • Charity Grace (1884-1965) as Mrs. Radford, one of the women at the boarding house table; a schoolteacher who retired at age 60 and took up acting, she was on TV from 1947 to 1964 and appeared in five episodes of the Hitchcock series, including "Party Line."
  • Edgar Dearing (1893-1974) as Louis, the bank guard; he played countless roles in films and TV shows from 1924 to 1964, but this was his only role on the Hitchcock show.
  • Barry Brooks (1910-2000) as the toy shop salesman; he was on screen from 1948 to 1985 and appeared on The Twilight Zone as well as this single episode of Alfred Hitchcock Presents.
Read "The Dusty Drawer" here or watch the TV version here; buy the DVD here. Read the GenreSnaps review of this episode here.

Sources:

"Contemporary Authors. Encyclopedia.Com. 6 May 2023 ." Encyclopedia.Com, www.encyclopedia.com/arts/educational-magazines/muheim-harry-miles-1920-2003.

"The Dusty Drawer." Alfred Hitchcock Presents, season 4, episode 33, CBS, 31 May 1959.

The FICTIONMAGS Index, http://www.philsp.com/homeville/FMI/0start.htm.

Grams, Martin, and Patrik Wikstrom. The Alfred Hitchcock Presents Companion. OTR Pub., 2001.

"Halstead Welles: Credits, Bio, News & More: Broadway World." BroadwayWorld, www.broadwayworld.com/people/Halstead-Welles/.

IMDb, IMDb.com, https://www.imdb.com/.

Muheim, Harry. "The Dusty Drawer." Hitchcock in Prime Time. Eds. Francis M. Nevins and Henry Slesar. NY: Avon, 1985. 181-198.

Stephensen-Payne, Phil. Galactic Central, http://philsp.com/.

"On Television This Week." New York Times, 3 August 1952, section 2, page 6.

Wikipedia, Wikimedia Foundation, https://www.wikipedia.org/.


Listen to Al Sjoerdsma discuss "Crackpot" here!

In two weeks: Our brief series on Halsted Welles continues with a look at "The Silk Petticoat," starring Michael Rennie!

Monday, May 15, 2023

Batman in the 1980s Issue 79: Winter/Holiday 1988 + The Best of 1988


The Dark Knight in the 1980s
by Jack Seabrook &
Peter Enfantino


Mignola
Batman #427

"A Death in the Family,
Chapters 3 & 4"
Story by Jim Starlin
Art by Jim Aparo & Mike DeCarlo

The hunt for Jason Todd's birth mother continues, with Batman and Robin tracking Shiva Woosan to a Beirut hotel, only to learn that she has been kidnapped by terrorists! Batman uses his powers of persuasion to learn the camp's location and he and Robin infiltrate it and put numerous terrorists to sleep as they search for the woman.

Meanwhile, in a famine relief camp in Ethiopia, the Joker tracks down the third candidate to be Jason's mom, Dr. Sheila Haywood, who he knows from her days in Gotham City "'performing illegal operations on teenage girls,'" as the Clown Prince of Crime delicately puts it. He blackmails her into letting him commandeer six truckloads of medical supplies that he can sell on the black market to rebuild his fortune.

Batman and Robin finally find Shiva Woosan, who turns out to be the notorious kung fu expert and assassin, Lady Shiva (last seen in Detective Comics Annual #1). She and the Dark Knight have quite a fight and, when it's over, Batman injects her with truth serum. She admits that she's never had a baby, so the Dynamic Duo head to Ethiopia to find Dr. Haywood.

Once they reach the famine camp, Jason and his mother are reunited and she explains how she was involved in a botched operation that ended her medical career in the states. Jason's father fell for another woman and Dr. Haywood allowed her baby son to be raised by his father and the other woman. She tells Jason that she has business to attend to; he sees her meeting with the Joker and eavesdrops on their conversation. The Joker, staying true to form, explains to the doctor that he is replacing the medical supplies with boxes of his lethal laughing gas, which will cause widespread carnage when the crates are opened.

Jason rushes to find Bruce to help stop the Joker. Batman suits up and takes off in the WhirlyBat to find the convoy of trucks carrying the lethal gas; he tells Jason not to try to deal with the dangerous criminal on his own. Jason finds his mother and reveals to her that he's really Robin; she marches him into her tent and hands him over to the Joker, admitting that she's been embezzling famine relief funds and doesn't want to be caught.

The Joker then proceeds to beat Jason viciously with a tire iron and leave him for dead, while the lad's mother does nothing to protect him. Batman intercepts the trucks carrying the gas and defuses the situation before heading back to the camp. The Joker sets an explosive device with a timer in Dr. Haywood's tent, ties her up, and leaves her and Jason to be blown to bits. Surprisingly, the Boy Wonder is alive and staggers to his feet. He unties his mother, who discovers that the Joker locked them both in! KA-THOOOOOM! The bomb goes off just as Batman arrives. Are Jason and his mother dead? Tune in next issue!

Jack: Wow! I've never read this before, but I think it's one of the best issues we've read. It's certainly much better than The Cult! Batman's fight with Lady Shiva is a good one; I was not aware that she would later become a major figure in the DC Universe. Aparo draws the Joker with such a long chin that it's funny and bizarre, especially when he has makeup on to cover his chalk-white face. Of course, the coincidence that the Joker would be with Jason's mother is a bit much, but it all works to make a very exciting story. Her betrayal of her son is heartbreaking, the Joker's beating of Jason is brutal, and the final pages, with the timer ticking down, are thrilling.

Peter: A very solid issue. If I'd read this back in '88, I'd have been sure Robin would be saved at the last second. No internet to ruin surprises for us back then. Sheila's transformation from loving mom to heartless beeyotch (she hangs around and sparks a ciggy while the Boy Wonder gets his head caved in) and then (next issue) back to proud mommy didn't ring true for me. She aided Joker in the murder of her son for what? To avoid a bad rep back in Gotham? Still, that climax is a powerful one and it makes one wonder how Bats doesn't kill Joker at some point in the future after all the really impolite acts he's been responsible for over the years.


Breyfogle
Detective Comics #594

"Ecstasy"
Story by Alan Grant
Art by Norm Breyfogle

Gotham currency trader Ed Hallen trips out on Ecstasy, buys three bombs, and decides it's time to clean Gotham streets of its drug dealers. Batman happens upon the scene just as Ed is about to drive over a gang of peddlers with his Porsche. His vehicular manslaughter denied, Ed hands the keys over to the yutes and walks away. With glee, the dealers hop in the car and... it explodes.

Just then, PI Joe Potato arrives and explains to Batman that he's been hired by an anonymous client to hunt down Ed Hallen and prevent him from detonating the three bombs he's bought. The Dark Knight leaves Potato to sort things out with the cops and heads out into the night. Meanwhile, Ed Hallen is arguing with the voice in his head.

The voice wins and Ed heads to the club owned by the recently incarcerated Ventriloquist. With a push of the red button, the club is no more. Now on to site number three, which happens to be the Bruford Tower, the office building where Ed plies his trade. Present are Ed's trader buddies, who are astonished to see their friend standing after all the E he consumed a few nights before. Batman and Potato burst into the room and Ed pulls out his final bomb, admitting he was the one who hired the PI to keep an eye on his activities. The voice inside feels betrayed and, suspecting the cork is about to blow, Batman shoves Hallen into a nearby safe just as he's pushing the button. Blooooooie! goes the trader. Potato and the Dark Knight trade compliments and each goes his separate way.

Jack: I guess this is the issue where I climb aboard the Breyfogle express! He inks his own pencils and it works very well. Alan Grant's story is great, too; the story of a trader hooked on Ecstasy had me from start to finish. I even liked private eye Joe Potato! The one odd note was Alfred's sarcasm on the phone with Batman--maybe he's just sleep-deprived.

Peter:
The voice inside Ed's head had me completely confused. I was assuming the whole time this was some master villain at work, much like Cornelius Stirk in the previous issue. That feeling lasted right up to the ending, where Ed confesses he hired Potato to shadow him. A decent story, but not on par with some of Grant's earlier work on the title. Sharp-eyed readers might notice that John Wagner's name has been dropped from the writing credits. The long story short is that Wagner expected much more pay from the title and, when the royalties never came, he hopped in the Bat-Glider and flew into the night. For a detailed report, you can read this. Norm Breyfogle's stock continues to grow; his stylized art meshes perfectly with the subject matter. Dark and stormy.


Hannigan & Garcia-Lopez
The Best of the Brave and the Bold #4

"And Hellgrammite is His Name!"
Story by Bob Haney
Art by Neal Adams and Dick Giordano
(Reprinted from The Brave and the Bold #80, November 1968)

Jack: I always wanted to like the Creeper, but the stories in which he appeared are often disappointing. Ditko drew him best and the art in this issue by Adams and Giordano isn't up to their usual standards. The story doesn't have much to it, either. Still, the layouts and page designs by Adams are excellent, even if his depiction of the two superheroes is a bit lacking this time out.

Once again, there are three backup stories by Kubert or Heath from the mid-1950s that feature terrific artwork. The inside front and back covers have a nice bio of Russ Heath that is reproduced here.


Back cover


Mignola
Batman #428

"A Death in the Family,
Chapter 5"
Story by Jim Starlin
Art by Jim Aparo & Mike DeCarlo

As Batman searches through the rubble following the explosion in Dr. Haywood's tent, he thinks back to how he met Jason Todd and how the lad become Robin and ended up here. The Dark Knight finds Dr. Haywood, who tells him that Jason shielded her with his body when the bomb went off. After she takes her final breath, Batman finds Robin, who is already dead.

Meanwhile, in Ethiopia, the Joker delivers boxes of medical supplies to smugglers and is surprised when members of the Iranian secret service introduce him to the Ayatollah, who wishes to offer the Joker a government position.

Bruce Wayne speaks to the authorities about the bomb blast and its victims; the next night, Batman finds the Joker's warehouse and more victims of his lethal laughing gas. He also sees a message scrawled on the wall telling him to meet the Joker at "42nd and 1st." Batman flies home and, after Jason's funeral is held, the Caped Crusader reasons that the Joker wants to meet him at the United Nations building in New York City. Superman appears and tells Batman that Iran has a new ambassador who has diplomatic immunity, so Batman can't touch him. Batman flies off the handle and punches Superman in the jaw, nearly breaking his own knuckles. A car pulls up and out steps the new ambassador from Iran--the Joker!

Jack: This issue screams "landmark" and "collectible"! The story is 22 pages long and the first six pages are taken up with recap, probably because the editor figured that many people would buy the issue who were not regular readers of the title. The late 1980s found DC killing off heroes right and left, and the full-page depiction of Batman holding Robin's dead body recalls Superman holding the dead body of Supergirl on the famous cover of Crisis on Infinite Earths #7, another "landmark" issue. Speaking of Superman, he makes a rather gratuitous appearance, basically to tell Batman to cool it in light of the Joker's new status. It was surprising to see a depiction of the Ayatollah in a comic and it was funny that even the Joker was taken aback by his appearance. Still, the last page, where the Joker announces his new role, is a hoot, and I'm glad the comic is back to normal size, even if it means they're dragging out the story for one more issue.

Peter: The Supes appearance seemed to me to be just an excuse to revive some Dark Knight Returns magic. Following a very potent extra-length epic last issue, this one is a bit of a letdown. As you say, Jack, there's the "Let's briefly reflect on the entirety of Jason Todd's history" chunk that wastes a quarter of the page count and then there's the inane reveal of Joker's new job (complete with cameo by Khomeini). Just a bit too silly for my taste. Let's get back to dark and stormy.


Paris Cullens/Malcolm Jones III
Detective Comics #595

"Our Man in Havana"
Story by Alan Grant
Art by Irv Novick & Steve Mitchell

Batman travels to Cuba to fight Thanagarians who are smuggling guns into Gotham inside cigar crates. The Dark Knight thwarts whatever plan is going on and blows up the cigar factory. He swims out of the Havana harbor, wondering how he'll get the hell out of Cuba.

Jack: It's hard to believe Alan Grant wrote this terrible story. It took me a while to realize it's part of another godforsaken DC crossover "event," but that explains a lot. I was relieved to see Irv Novick's name as the penciller after so many issues drawn by Norm Breyfogle, but the story is such a dud that even the more traditional art was dull.

Peter: I don't know whether to feel sorry more for Alan Grant, whose talents were clearly high above this swill he was forced to participate in (at least, I suspect he was forced), or me and Jack, who are forced to read this garbage. If I wanted to hold up a good example of why I ignored DC for the most part in the 1980s, this chapter of "Invasion" would settle the argument. According to my research, the mega-event crossed over into 30 titles and a three-issue mini-series. I'd sooner watch TikTok videos of ulcer operations than read another chapter of "Invasion." It all comes off as warmed-over Kree-Skrull to me. 

The art is awful, bland, and lifeless; surprising, since I liked Irv Novick's work on earlier Batman titles. It's odd that Batman is neither a/ wondering how Jason Todd is doing, or b/ mourning his fresh corpse. I'm not sure how long it will take for the effects of the Batman title to ripple over into 'tec

"Cold Cuts"
Story by Jeff O'Hare
Art by Roderick Delgado & Jerry Acerno

Mr. Freeze escapes from his work detail and breaks into S.T.A.R. Labs, where the scientists are working on an artificial diamond that can be used as a laser beam. When Batman answers an alarm at the Labs building, he's surprised by his archenemy, who freezes the Caped Crusader in ice cuffs. Freeze then aims the laser at Batman with an eye to slicing him in half, but Bats uses his Batarang to put the kibosh on Freeze's plot. In the kerfuffle, Mr. Freeze's helmet is damaged and Batman must save him before he meltssssss....

Jack: Another bonus book featuring an effort by some new folks features a run of the mill story and some very 1980s-style artwork. I like Mr. Freeze but the plot was lacking in substance. The best thing about it was the ending, where Batman rescues Mr. Freeze and shows some sensitivity.

Peter: A throwback to the old 60s comic stories, "Cold Cuts" is actually a bit more enjoyable than the usual bonus fare. Yep, it looks and reads like a fan submission, but then so did most of the Moench/Mandrake collaborations a few years before. At least "Cold Cuts" ain't pretentious.


The Best of the Brave and the Bold #5

"Red Water, Crimson Death"
Story by Dennis O'Neil
Art by Neal Adams
(Reprinted from The Brave and the Bold #93, January 1971)

Jack: We wrote about this classic Bat-tale eleven years ago on this very blog! It still holds up and the Adams art is superb. There are some interesting profiles of DC creators on the inside front and back covers that are reproduced here.


THE BEST (AND WORST) OF 1988


PETER

Best Script: Alan Moore, The Killing Joke
Best Art: Brian Bolland, The Killing Joke
Best All-Around Story: The Killing Joke
Worst Script: Mike Baron, "Slade's Demon" (Batman Annual #12)
Worst Art: Dave Cockrum/Mike DeCarlo, "You Shoulda Seen Him" (Batman #423)
Best Cover >


The Five Best Stories

1- The Killing Joke
2- "The Ratcatcher" (Detective Comics #585)
3- "The Diplomat's Son" (Batman #424)
4- "White Gold" (Batman #416)
5- "Rat Trap" (Detective Comics #586)


JACK

Best Script: Alan Moore, The Killing Joke
Best Art: Brian Bolland, The Killing Joke
Best All-Around Story: The Killing Joke
Worst Script: Lewis Klahr & Steve Piersall, "For the Love of Ivy"  
(Detective Comics #589)
Worst Art: Dean Haspiel & Denis Rodier, "For the Love of Ivy"
Best Cover >

The Five Best Stories

1- The Killing Joke
2- "A Death in the Family," chapters 3 & 4 (Batman #427)
3-"Ten Nights of the Beast," part 1 (Batman #417)
4-"Ten Nights of the Beast," part 3 (Batman #419)
5-"Rat Trap"

Next Week...
Batman without Robin

Thursday, May 11, 2023

Journey Into Strange Tales Issue 86: Atlas/ Marvel Horror


The Marvel/Atlas 
Horror Comics
Part 71
September 1954 
by Peter Enfantino


Mystery Tales 21

Cover by Harry Anderson

“The 13th Floor!” (a: Harry Anderson & John Forte) 1/2

(r: Dead of Night #7)

“Helen’s Hubby!” (a: Jay Scott Pike & Christopher Rule)

(r: Vault of Evil #16)

“Nothing!” (a: Tony DiPreta)

“Hate!” (a: Chuck Winter)

“It Walks Erect!” (a: Bob Powell) 1/2

(r: Weird Wonder Tales #7)


Hugh (who has a bad heart) gets some bad news from the family doctor about wife, Mary. Seems as though the damp has been playing havoc with her health and the doc says if the couple don’t get to a warmer climate fast, Mary is going to die. Oh, and it will be good for Hugh’s heart as well. Needing the extra dough to get them out of state as soon as possible, Hugh heads to the office for some overtime. Entering the elevator, he notices the attendant is not the usual guy. The elevator takes Hugh to “The 13th Floor!,” which is highly unusual since the building only has twelve stories. Exiting the elevator, Hugh enters an office and comes face-to-face with Death, who explains that Hugh is ready for that next step.


Hugh pleads with the Grim Reaper (who remains in shadow the entire strip) to let him return to life so that he can take care of the sickly Mary, and Death is sympathetic. Hugh is granted a reprieve but, Death warns him, he can’t come back for thirty years no matter what! Hugh smiles and leaves the office, entering the elevator just as he sees his wife exit and head for the office. Hugh sobs and realizes that Mary is dead and he won’t see her for three decades. A clever twist but there’s some truly sappy, almost romance comics-style writing that is hard to wade through: …his eyes reflected the love and tenderness of his inner selfthe concern that came to her then colored the overtones of her low voice… That sort of maudlin prose is not usually associated with the Atlas horror titles.


In the abysmal “Helen’s Hubby!,” a woman murders her rich husband but then must contact him through a seer when she realizes he forgot to sign the paperwork! Equally bad is “Nothing!,” about a con-man who answers an ad for a job at “Nothing, Incorporated” and is told the more nothing he sells, the more dough he earns. But as he hits the street and plies his wares, he begins to disappear. Nothing about “Nothing!” makes any sense.


A fortune teller sets into motion a deadly competition between salvage companies diving for the world’s largest pearl. The climactic twist of “Hate!,” where we discover that the old witch was setting the men up to be eaten by her pet giant clam, is extremely silly even for a funny book. The final story this issue, “It Walks Erect!,” only puts a cherry on top of what might be the five worst scripts assembled for a single Atlas horror issue. Doctor Nagan successfully transplants the lungs of an ape into a human being, so he heads down to Africa to hunt more gorillas (like any doctor would do).When the gorillas get wind of Nagan’s idea, they turn the tables on their hunter and transplant his head on the body of a gorilla. Like a gorilla would do. Sub-par art by the usually reliable Bob Powell. Avoid the mylar bag and slip Mystery Tales #21 into the back of the box with your coverless Fatman, the Human Flying Saucer comics.


Mystic
33

Cover by Harry Anderson

“Pain!” (a: Tony DiPreta) 1/2

“It Happened ‘neath the Sphinx!” (a: Jack Katz) 1/2

“The Part Time Corpse” (a: Al Eadah) ★★1/2

“The Man Who Vanished” (a: Chuck Winter)

“The Unexpected!” (a: Ogden Whitney) ★★1/2


With his new gizmo, nutty scientist Ralph Emery proves that even trees and flowers can feel “Pain!” But when his psychiatrist buddy opines that Emery is a loon, Ralph takes an axe to him and ends up going to the chair. “Pain!” has an interesting concept and hook but the script meanders and finds itself in a predictable corner. Albert Darret has been attempting to murder his wife in every stop during their vacation. Something always intercedes, be it the police or just dumb luck. Elinor Darret must be the luckiest woman in the world. But now, beneath the Sphinx in Egypt, Albert will finally do the job just right. Then, just as the three-time loser gives Elinor a push over a steep ledge, the Sphinx comes to life and eats him. Why? I don’t know. “It Happened ‘neath the Sphinx!” is a real head-scratcher.


Dead at the ripe old age of 28, Jan Quill finds himself outside of his coffin, gazing at his tombstone. How could this happen? A robed figure approaches and explains to Jan that he is now a “The Part-Time Corpse,” with living privileges only on Tuesdays. Jan is beside himself with happiness and takes advantage of the situation by going out on the town every Tuesday night and drinking, carousing, and meeting women. Obviously, just because he’s dead doesn’t mean Jan can’t have a good time. Forget that musty odor and the fact that he wears the same clothes every time he goes out. He’s killing it with the dames.


Then he meets Ellen and falls madly in love. Ellen reciprocates and, before too long, Jan is resentful that he’s a one-day-a-week guy. He goes to the robed figure and begs for a couple more days a week so that he can maintain a marriage and maybe some undead kids. The shadowy agent refuses. So Jan makes it his mission to find a way to change his vacation schedule. In a book of black magic, Jan finds the potion he needs, whips it up, and tosses it at his one-time savior at their next meeting. The robe falls away and Jan discovers the “man” is really Ellen, who had loved his corpse from afar and decided to bring him back so that she could find love as well.


“The Part-Time Corpse” is full-on goofy but wildly imaginative. Not all the pieces fit right (at one point, it’s mentioned that Jan has rented an apartment but I’m wondering where he’s getting the dough for that and all the wild Tuesday night carousing he’s up to), but the heart is there. You feel sympathy for Jan while at the same time wondering why he’s not rotting, and if he has to dig his way out and back into his grave every Tuesday. 


In the one-dimensional “The Man Who Vanished,” Abner Grinn invents a time machine but after a publicity-seeking reporter jumps in and is never seen again, Abner is arrested for murder. Meanwhile, five hundred years in the future, the reporter is now the “guest” of strange green aliens.


Clyde is a grade-A psychology student but a lousy gambler. Now, he owes some mobsters twenty grand and they’re going to collect in blood if Clyde can’t pony up. His rich Aunt Helen refuses to loan her nephew the dough (reminding him, conveniently, that he is her sole heir and will receive her millions when she kicks off) but later, while Clyde is discussing his problems with his dorm partner Richard, a crime major, Abner concocts what he thinks is the perfect murder. He asks Richard to bring a package up to Aunt Helen but use the flat key so as not to disturb her. He then calls his Aunt, disguises his voice, and tells her he’s coming up to strangle her. When Richard opens the door, Aunt Helen backs away and falls out the window and lands on Clyde, killing him. Even the perfect crime can be upended by “The Unexpected!” A cliched strip that checks all the boxes, but a funny climax and some striking art by Ogden Whitney (particularly the splash, which depicts a skeletal hand placing a bet) provide at least a bit of entertainment.


Uncanny Tales 24

Cover by Harry Anderson

“Who’s Who?” (a: Robert Q. Sale) ★★

“Death!” (a: Myron Fass) ★★★

“Wish You Were Here!” (a: Mannie Banks) ★★★

“The Last Man!” (a: Ed Moline) 1/2

“Escape!” (a: Jerry Grandenetti) ★★


Esteemed plastic surgeon Dr. John Blake has everything he could want… except for the wife of his assistant, Tom Kent. Blake and Mrs. Kent carry on an affair but, enough is enough, something’s got to be done. Blake gets Kent drunk and then performs plastic surgery on both he and Kent, switching faces! Problem is, Mrs. Kent still wants her John Blake! “Who’s Who?” is a ludicrous medical fantasy (Kent successfully sculpts his own face without the luxury of anesthesia!), redeemed partially by Robert Q. Sale’s grungy graphics. 


Anna loves her dying husband, Jan, so much that she would do anything to keep him alive, including visiting all the witches and black magic practitioners in the area but it’s all for not. Her ex-beau, Karl, still smarting from Anna choosing another, begins circling the home like a vulture. He tells Anna that “Death!” will come to her door the next morning and she must surrender Jan. The next morning, sure enough, a robed figure appears at the door, enters, and approaches Jan’s bed. But Anna refuses to give up without a fight and buries a dagger in the figure’s back. Just then, the real Grim Reaper enters and takes Karl’s robed corpse away. A very effective little chiller; the climactic twist is not 100% unexpected but handled well nonetheless. Perhaps the best graphics Myron Fass ever delivered to the Atlas horror comics.


In the charming “Wish You Were Here!,” a chance encounter with an 1880s stagecoach on a 1954 street convinces a lonely postcard collector that he needs to board that carriage the next time it comes through. Decent visuals is the only thing that saves “The Last Man!” from the scrap heap. George Jason joins a “Last Man” club (the members gather and toast the fallen as their comrades die) and quickly becomes “The Last Man!” 


Convict Wally Judd manages to “Escape!” in the coffin carrying a dead cellmate. But once he gets on the outside, Wally can’t keep from screwing up. He robs a grocery store and the manager tosses red pepper in Wally’s eyes. Unable to drive his getaway car, he grabs the first man who crosses his path and tosses him into the driver’s seat. Though the man protests that he can’t drive, Wally’s revolver is intimidating and he does the best he can. They get a couple miles down the road and sail over a cliff. As he’s dying, Wally regains his eyesight and looks over at the man in the driver’s seat. A sign reading “I Am Blind” hangs around his neck. Wally just can’t buy a break.


In Two Weeks...
This Matt Fox Classic is Only One of the
35 Tales of Terror to be Discussed in a
Jam-Packed Bonus-Sized Issue!